MongoDB is a NoSQL database, free of charge. The beauty of mongo relies on its schema-less design… you can add and remove fields, without doing ‘alter table’.
Your information gets stored in JSON, which is seriously interesting, specially if you work with iOS / Android Apps, and the communications layer works in json.
So.. fire up a browser, and head to this urls. Assuming you’re running OSX (like me!), you’d need the mac binary, which is about 60 megabytes.
Preferrably, you’ll need to download the 64 bits executable. The 32 bits version can address only databases up to 2 gigabytes.
Once you’ve got the file, simply double click on it, to get it uncompressed. Assuming that the file is in the downloads folder, let’s move it to a more suitable location.
Launch terminal, and type the following:
sudo
cd ~/Downloads/
sudo mv mongodb /usr/local/mongodb
Mongo stores its databases in the "/data/db" directory, so… we’d need to create them:
mkdir /data
mkdir /data/db
chmod 777 /data/db
Now, let’s add a couple symbolic links, so you can launch mongo from anywhere in the system:
cd /usr/local/bin
ln /usr/local/mongodb/bin/mongod
That’s it! you’ve just installed mongo!. In order to launch the database, you simply need to type the ‘mongodb’ command.
If you wanna launch a command-line client, type ‘mongo’, which should connect to the server, right away.


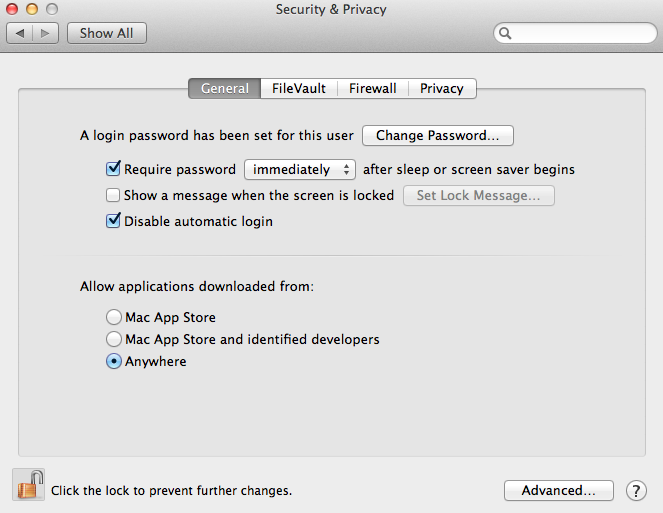
 So… you own an iMac.. maybe a Macbook Pro, or maybe you’re one of the lucky owners of a Mac Pro. You’ve been watching ads for the last ten years… you bought it all, and you feel safe just because it’s not a windows… right?.