Dropbox Two Step Authentication

Dropbox Two Step Authentication

Have you ever heard about keyloggers?. Just in case you haven’t… keyloggers are a super simple piece of technology. They are software applications that can be installed in almost every PC / Mac, and they simply save every keystroke.

They’re invisible to the user. So… they just know everything you type. Including passwords. Keyloggers generate a logfile, which can be (in some cases) sent via email to the guy who is spying on you… and in other cases, they just generate a textfile somewhere in the system… which will eventually be downloaded, and your whole security exposed.

So… long short story, keyloggers are a threat to your email account, homebanking, skype, facebook… everything you use online, can be super easily “hacked”. That includes Dropbox!.

I don’t know about you, but i store personal files in Dropbox, such as pictures, and documents… i just use it as an online backup “just in case”. If i got hacked, the idea of someone else skimming through my stuff… well, it’s pretty scary.

So, what can we do?


Let’s set up Two Step Authentication!
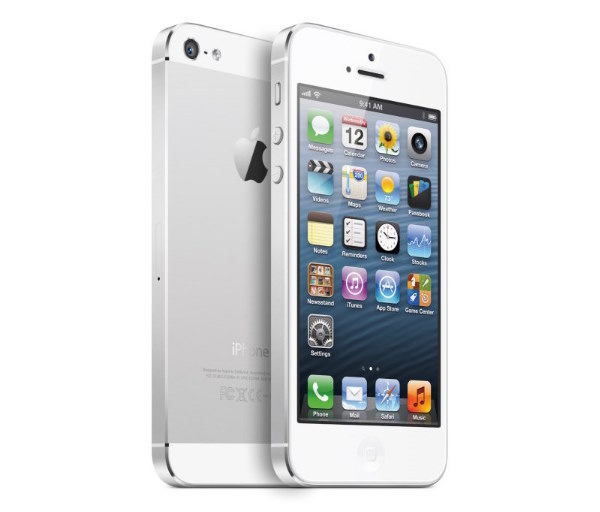
  1. First things first. We’re gonna need to install Google Authenticator app. So, if you use an iOS device, get it here. If you’re an android user… (shame on you!)… get it here.
  2. Head to dropbox.com, and login with your account.
  3. Click in the top right corner, and find the ‘Settings’ link.
  4. Click on the ‘Security’ tab. You should see the following:dropbox-two-step-verification
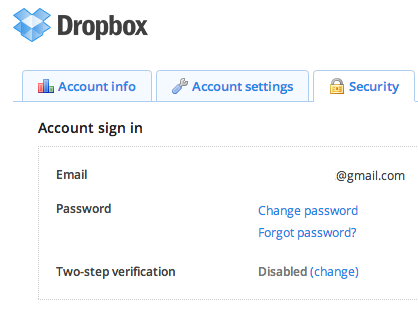
  5. See the ‘Two-step verification’ option?. Click on ‘Change!’
  6. Follow the instructions, until you get the following barcode onscreen:dropbox-barcode
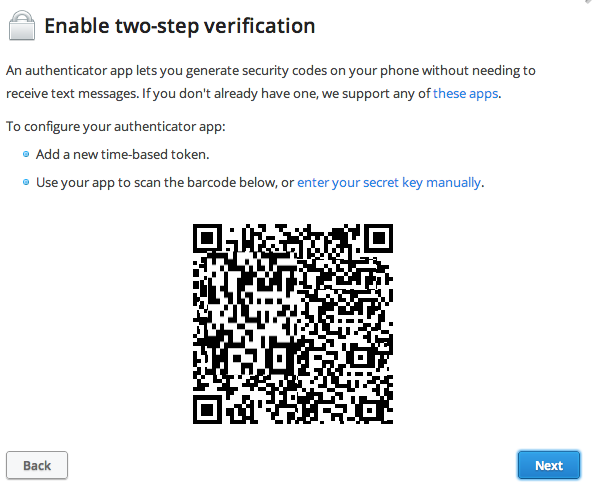
  7. Well, at this point, you need to launch Google Authenticator App. Tap the ‘ + ‘ button, and tap the ‘Scan Barcode’ option. You’re gonna need to scan the QR code you’ve got onscreen.
  8. If everything went fine, your Google Authenticator app should already have an entry with a 6 digit number matching your Dropbox Account.
  9. Please, keep somewhere safe your 6 digit rescue code. That will save you, in case of emergency.
  10. You’re all set!.

Next time you log into your Dropbox account, the system will ask you to enter the 6 digits given by Google Authenticator app. Why is it good? why you should use it?….

Remember when we spoke about keyloggers?. Well, imagine you’ve got a keylogger installed in your computer….. no one, even with your passwords, will be able to log into your account. Unless they ALSO have your phone.

It’s an extra security measure, which makes things even more complicated. You’re not unhackable. But at least no script kiddie will be able to simply hijack your system.

Stay safe!

New iPhone Jailbreak!

iphone-jailbreak

Today, a new iPhone Jailbreak solution, has been announced to be already on its way. iOS 6.0 and 6.1 beta 4 have been both jailbroken, and the team is waiting for iOS 6.1 final release to launch the goodies!.

If you have a previous iOS version, and you still wanna jailbreak your device, you should head to this site. They have a nice archive of every JB solution that got released.

By the way, Jailbreaking an iOS device is completely legal. However, downloading illegal copies of iOS Apps is not cool, and we recommend you do not engage in those activities.

Support the developers..!!

Do Macs need Antivirus?. Yeah, they do!

MacbookPro
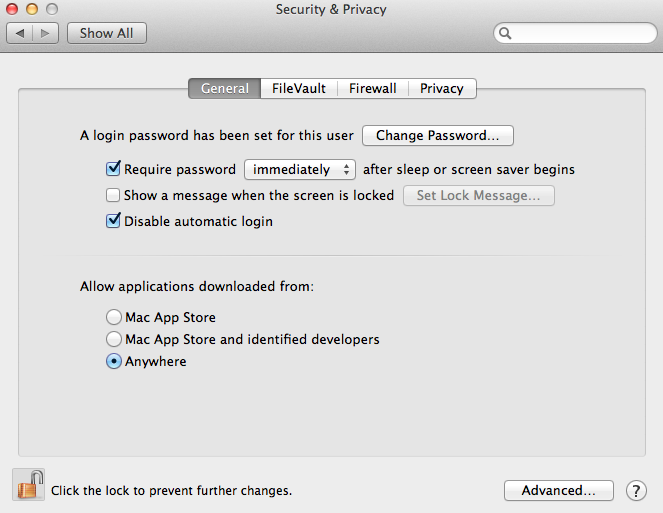
So… you own an iMac.. maybe a Macbook Pro, or maybe you’re one of the lucky owners of a Mac Pro. You’ve been watching ads for the last ten years… you bought it all, and you feel safe just because it’s not a windows… right?.

Well… things are not the way they were a couple years ago. As Apple gained more and more marketshare, virus developers turned their eyes on our belived OSX system. Since Java virtual machine has been found to be buggy… several viruses that affected Mac have been caught in the wild.

What can we do?. Well.. there are a couple things you could do….

1. Enable Mac Gatekeeper

What is the Mac Gatekeeper?. Well, the concept is simple. We just close the door to malicious software, by only installing software from trusted sources. Ever wondered why there are no viruses for iPhone?. Well… it’s because iOS ecosystem is a walled garden. By enabling the Gatekeeper, you’d be replicating the same safe environment as iOS has.

In order to enable the GateKeeper, you need to go to “System Preferences >> Security & Privacy” (in Mountain Lion). You will get this screen:

Screen Shot 2013-01-23 at 11.36.08 PM

See where it says ‘Allow applications downloaded from’?. Make sure you check ‘Mac App Store’ (or Mac App Store + identified devs). ‘Anywhere’ is not recommended.

That way you’re computer will install software ONLY from trusted sources.

2. Install Mac Antivirus Software

Yes… installing an antivirus will impact, slightly, on your performance. But at the very least, you’ll get to feel safe again. It’s just a feeling, bear that in mind, always!.

What antivirus software can you use?. Well, you could try AVG for Mac (which is free!), ESET for Mac (paid, but one of the best), and Norton Antivirus for Mac.

3. Install a Firewall

One of the things that make me freak out the most… is not knowing what applications are openning connections with remote servers. So… if you’re paranoid like me, you could simply install a firewall, and validate, process by process, if they really need to access internet.

Hopefully, with this extra software you’ll be able to stay away from trouble. Again… hopefully!.

Bruteforcing Http Auth on OSX

password-cracking

Suppose you forgot the password of your router. What can you do?…. should you just reset the device?.
Nahhhh…. that’s boring. That’s why we’re gonna try to bruteforce http basic authentication.

We’re assuming that you run some incarnation of OSX, and you have Mac Ports installed. Right?.
We’ll need to download hydra… a bruteforce tool… so… fire up a terminal, and type the following:

[cc lang=”bash”]sudo port install hydra[/cc]

So far so good. Now, we’re gonna need to create our own password list. In order to do so, we’ll rely on crunch. It’s a nice shell tool, that builds on OSX as well. Download it here first. If you get any troubles building it, try typing:

[cc lang=”bash”]gcc crunch.c -o crunch[/cc]

For some reason, the makefile isn’t working… so i just built it right away with gcc.

Allright! we’ve got all what we need. Now, let’s suppose we wanna generate passwords with 5 characters length, including lowercase, uppercase and numbers. So… we should fire up our terminal, and type this:

[code]./crunch 5 5 -f charset.lst mixalpha-numeric -o wordlist.txt[/code]

Beware. That will take about 5 GB of space of your storage. Okay, okay. We’re almost there. Now, it’s time to try hydra. Try the following syntax:

[cc lang=”bash”]hydra -l admin -P wordlist.txt -vV -s 80 HOSTNAME http-get /[/cc]

Of course. We need the username, in this example we assume it’s ‘admin’. And we also assume that we’re hitting port 80.
Good luck!

Setting OSX Firmware Password

OSX is a strong and secure system. Until you realize there is a feature called ‘single user login’… which virtually grants you ROOT access, provided that you have physical access to the target machine.

  1. Boot the system.
  2. Press CMD + S.
  3. You should get a bash shell, with ROOT permissions.

That sucks, pretty much. There is just no single password screen. If you have the machine, you can access its files. How do we prevent this????.

In Lion, and Mountain Lion…:

  1. Open Terminal and type:

    [cc lang=”bash”]defaults write com.apple.DiskUtility DUDebugMenuEnabled 1[/cc]

  2. Open DiskUtility and choose “Show every partition”, from the ‘Debug’ menu you have just unlocked.
  3. Mount the ‘Recovery HD’ hidden partition.
  4. In Terminal, type:[cc lang=”bash”]open /Volumes/Recovery\ HD/com.apple.recovery.boot/BaseSystem.dmg[/cc]
  5. In the BaseSystem DMG you’ve just mounted, locate: Applications/Utilities.
  6. Launch ‘Firmware Password Utility’, and simply follow the instructions.

That should, at the very least, enhance a little bit your security.

%d